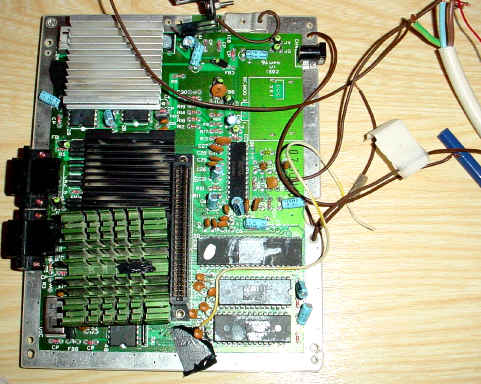
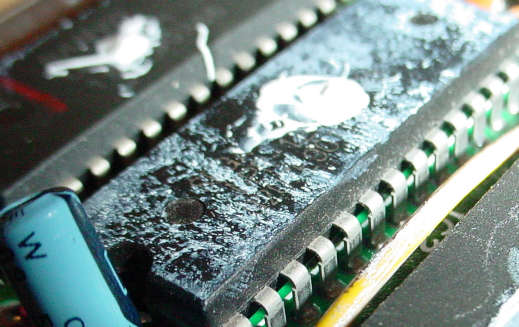
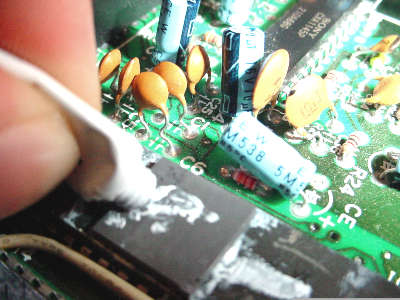
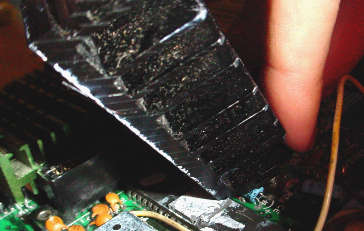
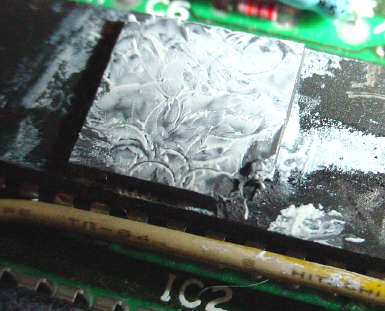
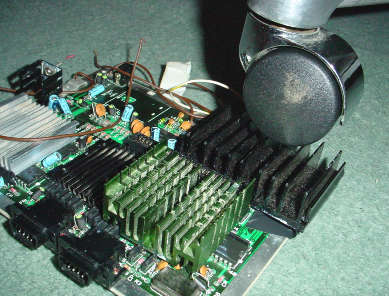
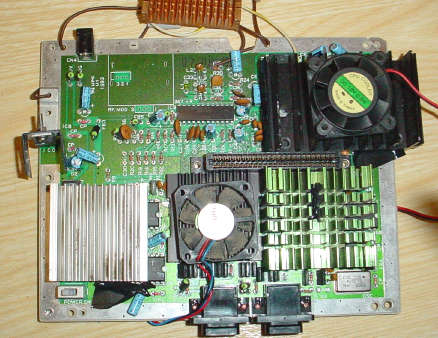
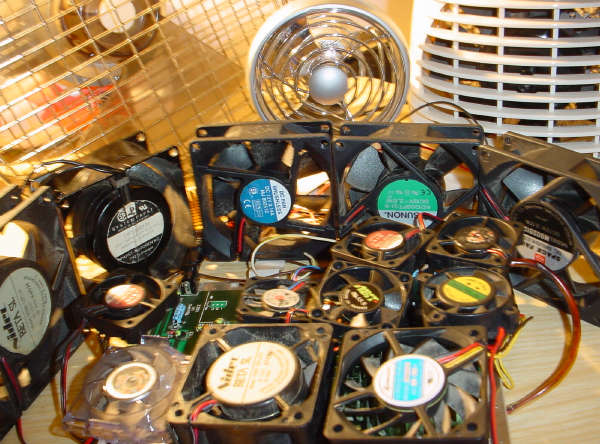
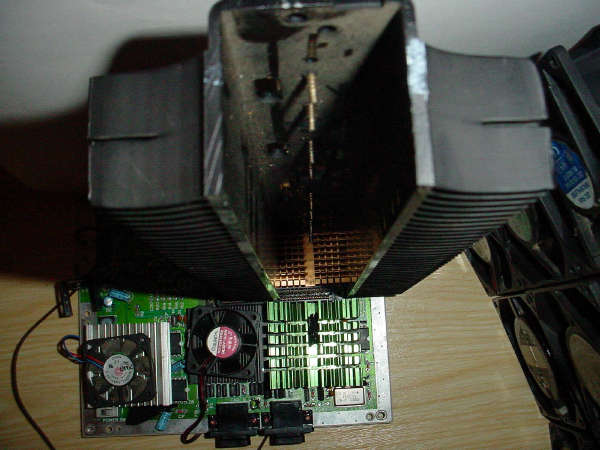
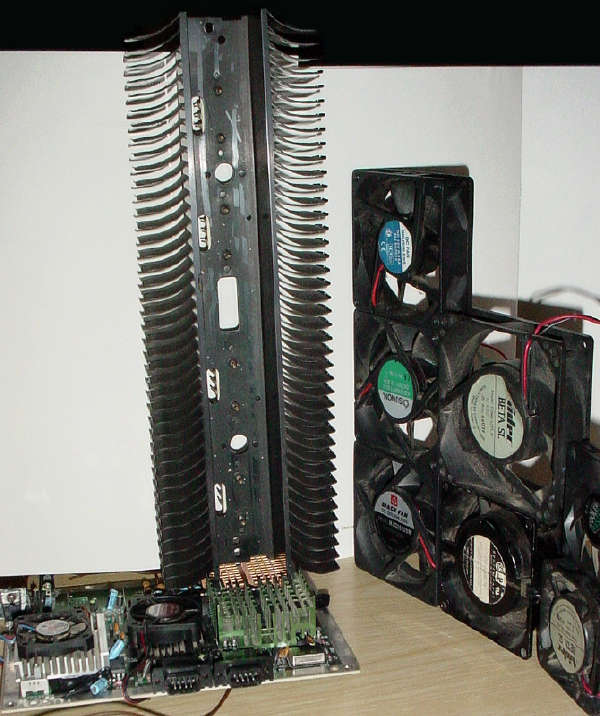
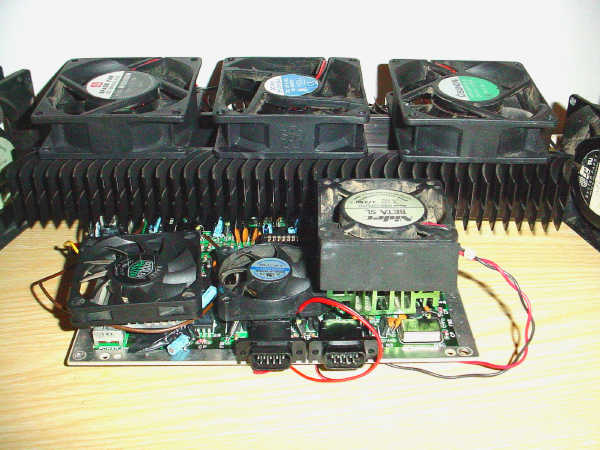
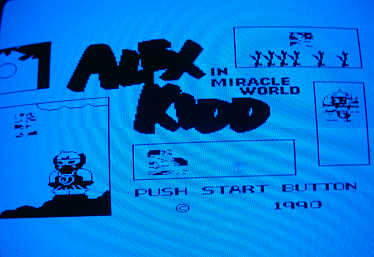
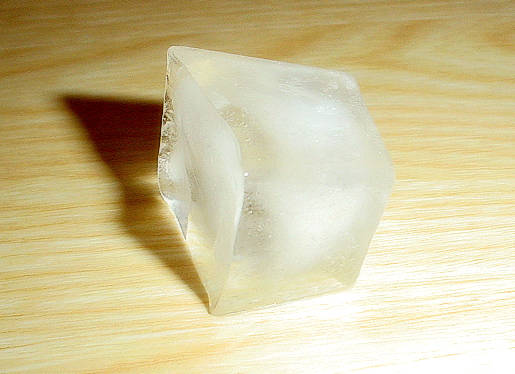
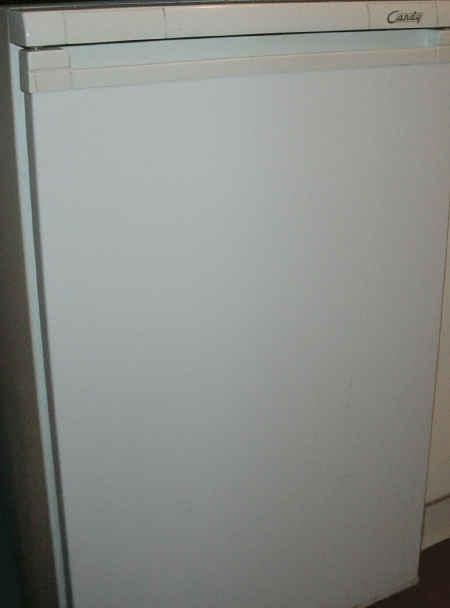
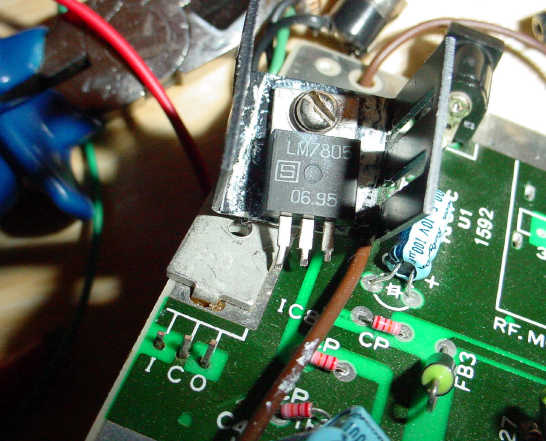
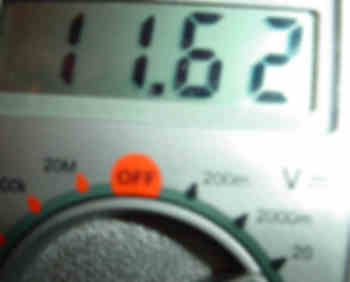
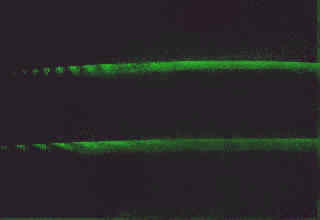
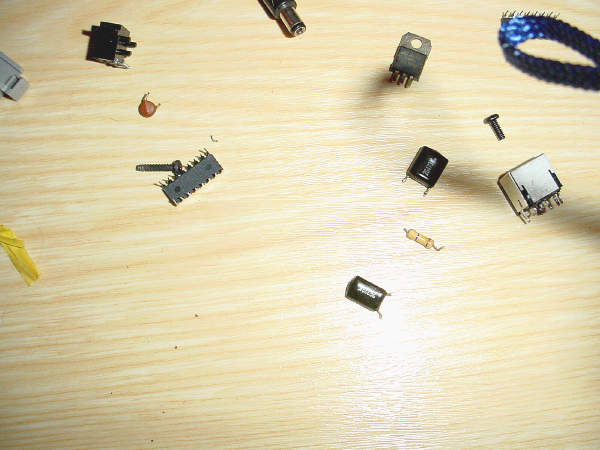
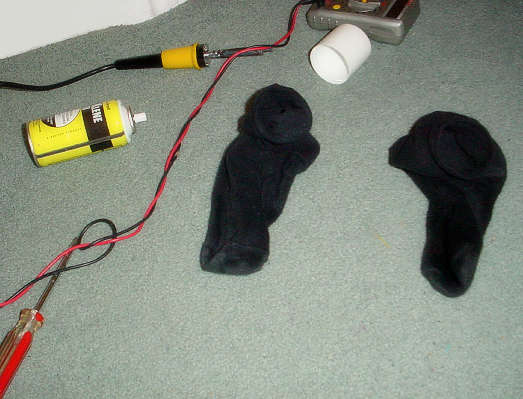
Extreme OverclockingIntroductionThroughout the last decade, the technique of overclocking has evolved from a relatively obscure and universally frowned-upon undertaking, to something that almost every PC enthusiast has dabbled in. These days, overclockers typically invest large sums of money into equipment -- and cooling devices in particular -- to enable them to increase the performance of their CPU by a few 10s of percent (or see it go up in flames when it latches up). This sounded like such utterly pointless fun that we decided to try it ourselves. The system we have chosen to overclock today is the Sega Mastersystem 2. This machine -- featuring an advanced Zilog Z80 CPU at 4000kHz, and a custom, high-performance VDP capable of pushing 2,949 million millipixels a second -- has already undergone extensive modific... sorry, _modding_, including the addition of an RGB output and removal of the RF modulator. HeatsinkingThe first step of any overclocking project is to consider the serious matter of heat. [editor -- insert rant about heat here] So, we installed heatsinks on each and every chip (excluding the composite video encoder, which is boring and not optimised for EXTREME overclocking anyway). Obviously a heatsink alone isn't enough; we're not complete until the heatsink is connected to the chips via a heat-resisting layer of thick thermal grease. Just the thing we need to keep those CPU temps down. Thermal interface compound was applied between the centre of each integrated circuit and its heatsink, followed by the heatsink being secured by high-performance thermal epoxy. Attention was then turned to the CPU. Due to the extreme heat being produced -- higher than anything we've ever experienced in an electronic device -- extreme precision is called for. Thermal interface compound was applied minimally to the CPU core, and spread out evenly to form a thin interfacing layer. This will allow us to reach the extreme cooling levels we need. Finally, the CPU heatsink was installed, taking care not to install the heatsink at an angle, which can crush or chip the CPU core. Once the replacement CPU was shipped and installed, the heatsink was re-installed. Last but not least, the appropriate degree of pressure was applied to the heatsink by way of the heatsink retention clip to ensure it remains in contact with the core. With all cabling in place, the system was ready to power up. Due to the extreme currents involved, extra heatsinking was added to the supply cables. As we know, any heat at all is bad news. Initial overclockingAs expected, the system booted and entered the operating system (Alex .KID Server 2003; built-in). As always, the system was "rock steady" at 4MHz, with a core voltage of 4.96v. With everything in working order, it was time to crank the pace up. The clock frequency was raised to 8MHz, and once again the system was booted. Unfortunately, the system was not in a healthy state, with CPU temps soaring, and the system failing to make it past the "SEGA" screen without a crash. Clearly, we had a heat problem on our hands. Active CoolingIt was at this point we realised our fatal mistake. Someone had forgotten to install the CPU and chipset fans. As we all know, there's no passive heatsink out there that can match the sheer cooling power of a noisy unreliable fan stuck on top of an undersized heatsink (usually made in Taiwan). With the fans installed, the system once again booted, and the CPU temps were far lower. However, it only once managed to get past the SEGA screen, indicating that there were still other problems to be solved before we could take this machine to the extreme. Over-voltingWhen faced with instability problems like this, any overclocker knows what to do -- raise the core voltage. And add more cooling. So, that's exactly what we did -- we raised the core voltage to 6.91 volts (using the BIOS), and added the appropriate amount of cooling. The system appeared to boot reliably at this point, and even made it to the title screen before crashing. Unfortunately, the over-volting caused the analogue video electronics to throw a fit, and create impressive colour distortion effects. However, we don't care, as everything revolves around performance. Another noticeable problem was apparent -- some corruption was visible on the title screen, before the system promptly crashed. The CPU temperature was found to be far higher than ever before; maybe as much as 10 degrees C higher. That's searing heat, and completely unacceptable for any electronic device. We quickly deduced the nature of the problem -- combined, the fans were drawing a power of 90 watts, which was obviously being converted to heat. This is more heat than an Advanced Micro Devices Athlon (tm) microprocessor generates, although obviously one cannot compare the performance of such a pitiful CPU to the might of the Mastersystem. A step furtherObviously, the number of fans had to be reduced. And with that comes the requirement for a slightly larger heatsink. After obtaining clearance from the local airport, the new heatsink was erected on the Mastersystem and secured with guy ropes. A small number of cooling fans were installed to one side of the heatsink to aid airflow. Then it collapsed, so we installed it in a more sensible orientation. Once again the system booted at 8MHz, but this time with success! The system managed to render the title screen fully and would even run "properly". Unfortunately, corruption still remained. This was thought to be due to the CPU temperature still being too high, or the core voltage too low. With the system stable at 8MHz, it was decided that we should try and push it to 13MHz. Unfortunately, the system would not even boot at this frequency, so it was clocked back to 8MHz. SupercoolingSomehow we needed to get the CPU temperatures lower -- 20C is far too high for a computer system. Some high performance coolant blocks were removed from the rotary compressive heat transfer apparatus and installed on the CPU, VDP and glue chips. Obviously, the chips had to be masked to prevent condensation damage. The system was booted, and again was stable at 8MHz. Some of the colour problems with the analogue circuitry had diminished somewhat due to the cooling. Unfortunately, the screen corruption was still present; a timing issue is thought to be responsible for this. Before the ice completely melted, the CPU was clocked at 13MHz, and a boot was attempted. Unfortunately, it still wouldn't boot. As a desperate final measure before the rapidly melting cooling devices rendered the board unusable, the core voltage was taken up to 11.62 volts, in the hope of obtaining a boot at 13MHz. Unfortunately, there was no such luck; flashing lines appeared on the screen, but no code executed. With the ice completely melted and the puddles mopped up, the system was taken back down to 8MHz, 6.91vcore. An aerosol was obtained, and sprayed onto the CPU, VDP and Glue chips for a short period of time, cooling them to a level lower than that of the ice. The system was then booted, but the corruption remained. The CPU frequency was then taken up to 13MHz one last time, and more "coolant" was discharged onto the integrated circuits. Unfortunately, due to the use of the aerosol in a completely sealed room, the technician collapsed -- overpowered with the fumes -- and knocked the core voltage switch on the way down. Almost 172v was applied to a core designed for only 5.0v. After the roofing contractor had finished installing the new roof, the test bench was examined. As expected, the vast majority of the system had vaporised. Upon further inspection, the technician appeared to be missing. One theory suggests that an ejection through the roof took place. ConclusionsIt didn't work. | Note: | This document may contain minor technical inaccuracies in places ;)
But yes, it really did overclock to 8MHz |
| 